
Cherry Cheesecake Tacos Recipe
Introduction
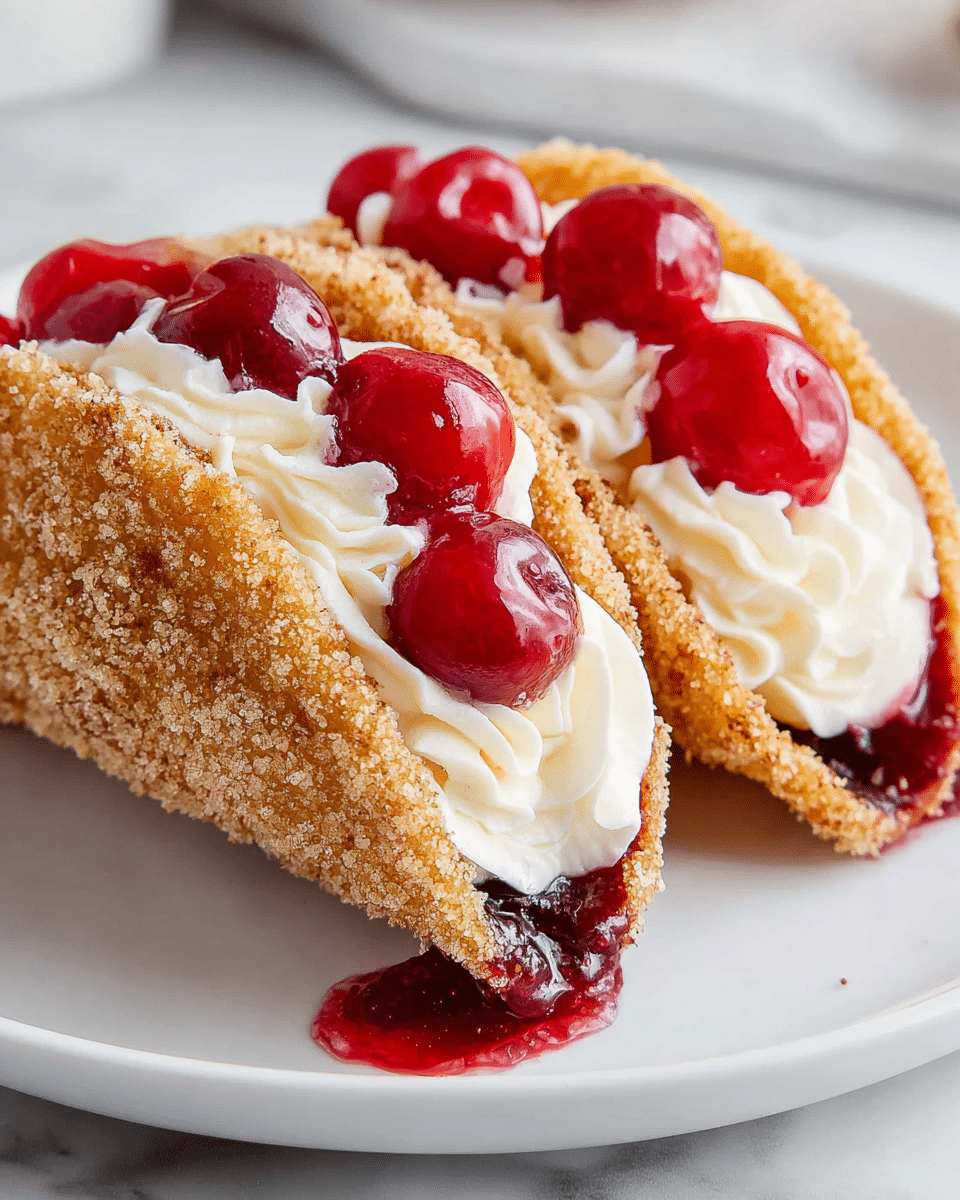
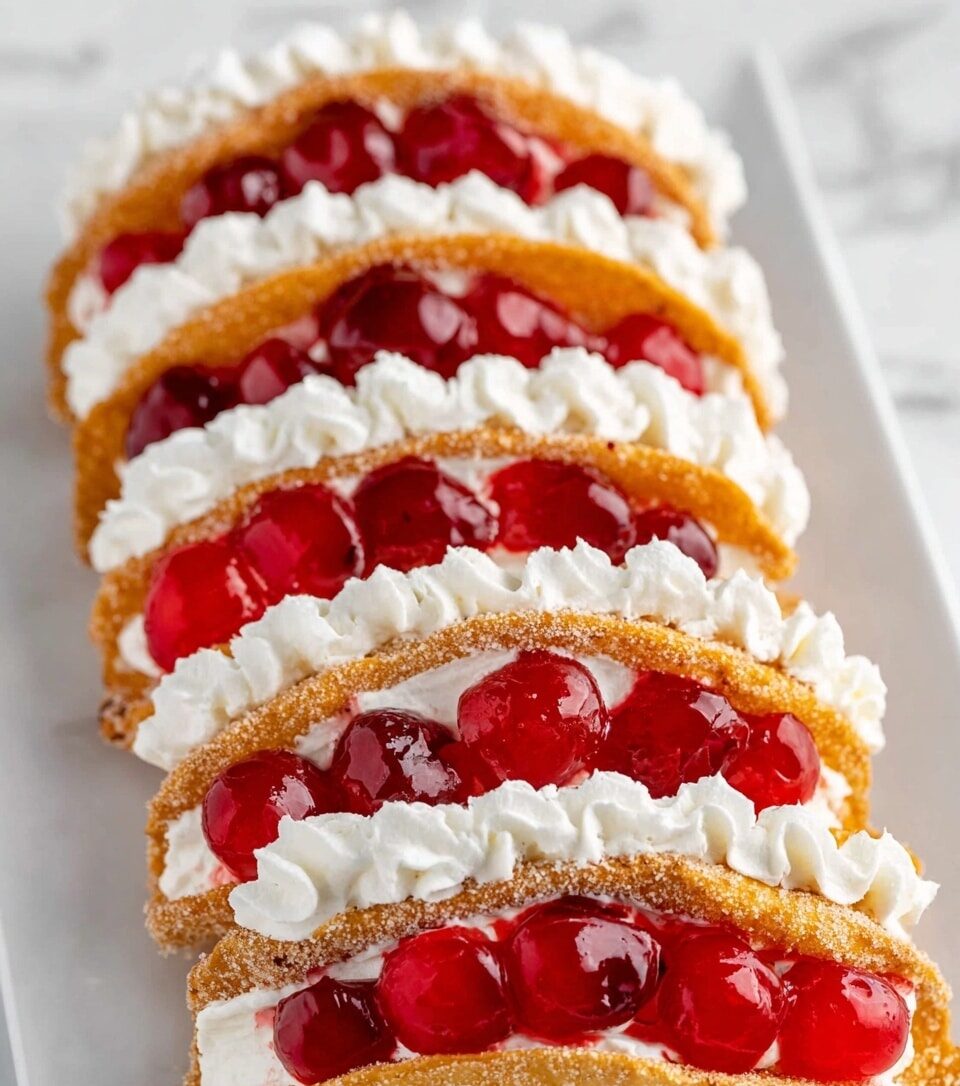
Cherry Cheesecake Tacos offer a fun and delicious twist on traditional desserts. This recipe combines creamy cheesecake filling with sweet cherry topping inside a crispy cinnamon-sugar taco shell—perfect for parties or a special treat.
Ingredients
- 8 ounces cream cheese, softened
- ⅓ cup powdered sugar
- 2 teaspoons vanilla extract
- 8 ounces Cool Whip frozen whipped topping, thawed
- 21 ounces cherry pie filling
- 1 cup granulated sugar
- 3 teaspoons ground cinnamon
- 18 street taco-size flour tortillas (or cut soft taco-size tortillas to 4-inch rounds)
- ½ cup butter, melted
Instructions
- Step 1: In a small bowl, combine the granulated sugar and ground cinnamon. Set aside.
- Step 2: In a medium mixing bowl, beat together the softened cream cheese, powdered sugar, and vanilla extract until smooth and fully combined.
- Step 3: Add the thawed Cool Whip to the cream cheese mixture and continue beating until the filling is fluffy and smooth.
- Step 4: Transfer the cheesecake filling to a piping bag fitted with a large round tip or to a gallon-sized Ziploc bag with a corner snipped off. Refrigerate to keep cold while preparing the taco shells.
- Step 5: Preheat your oven to 400°F (200°C). Line the bottom of an inverted cupcake pan with parchment paper to catch any drips.
- Step 6: Brush both sides of each tortilla with melted butter. Sprinkle cinnamon sugar generously on both sides. Fold each tortilla in half to form a taco shape and place it over the inverted cupcake pan’s bumps to hold its shape. Repeat until the pan is filled, using multiple pans or doing batches.
- Step 7: Bake the taco shells in the preheated oven for 8 to 10 minutes, or until they start to brown. Let them cool in the pan for 10 minutes, then transfer to a cooling rack to cool completely. This allows the shells to crisp up while still maintaining shape.
- Step 8: Once the taco shells are cooled, pipe a generous line of cheesecake filling down the center of each shell.
- Step 9: Top each filled taco with 3 to 4 cherries along with some of the cherry pie filling sauce.
- Step 10: Serve immediately for best texture and freshness.
Tips & Variations
- Use fresh cherries or other seasonal fruit if you prefer a fresher topping.
- For extra crunch, lightly toast the tortillas before buttering and coating them.
- Swap Cool Whip for homemade whipped cream for a richer filling.
- If you don’t have a piping bag, use a resealable plastic bag and cut a small hole in the corner to pipe the filling.
Storage
Store the cheesecake filling in an airtight container in the refrigerator for up to 3 days. Keep the taco shells separate in an airtight container at room temperature for up to 2 days to maintain crispness. Assemble tacos just before serving to avoid sogginess. If you need to reheat shells, warm them briefly in a low oven (about 300°F) for a few minutes.
How to Serve
Serve this delicious recipe with your favorite sides.
FAQs
Can I make the taco shells ahead of time?
Yes, you can bake the taco shells a day in advance and store them in an airtight container at room temperature. This helps them stay crisp until you’re ready to fill and serve.
What can I use if I don’t have pie filling?
You can use fresh or frozen cherries cooked down with a little sugar and cornstarch to thicken, or substitute with other fruit fillings like blueberry or strawberry based on your preference.
Print
Cherry Cheesecake Tacos Recipe
- Total Time: 30 minutes
- Yield: 18 dessert tacos 1x
Description
These Cherry Cheesecake Tacos are a delightful twist on classic dessert tacos, featuring crispy cinnamon-sugar coated tortilla shells filled with a rich and fluffy cream cheese and whipped topping mixture, crowned with sweet cherry pie filling. Perfect for parties or a fun family treat, these tacos combine the comforting flavors of cheesecake and the festive appeal of handheld tacos.
Ingredients
Cheesecake Filling
- 8 ounces cream cheese, softened
- ⅓ cup powdered sugar
- 2 teaspoons vanilla extract
- 8 ounces Cool Whip frozen whipped topping, thawed
Taco Shells
- 18 street taco-size flour tortillas (or cut soft taco-size tortillas to 4-inch rounds with a bowl, glass, or cookie cutter)
- ½ cup butter, melted
- 1 cup granulated sugar
- 3 teaspoons ground cinnamon
Toppings
- 21 ounces cherry pie filling
Instructions
- Prepare Cinnamon Sugar: Combine the granulated sugar and ground cinnamon in a small bowl and set aside for coating the tortillas later.
- Make Cheesecake Filling: In a medium mixing bowl, beat together the softened cream cheese, powdered sugar, and vanilla extract until well combined and creamy.
- Incorporate Whipped Topping: Add the thawed Cool Whip to the cream cheese mixture and continue beating until the mixture is smooth, creamy, and fluffy.
- Chill Filling: Transfer the cheesecake mixture into a piping bag fitted with a #1M tip or into a gallon-sized Ziploc bag. Refrigerate to keep it cold while preparing the taco shells.
- Preheat Oven and Prepare Pan: Preheat your oven to 400°F (204°C). Line the bottom of a cupcake pan with parchment paper to prevent sticking and to assist in shaping.
- Butter and Coat Tortillas: Brush melted butter on both sides of each tortilla, then evenly sprinkle the cinnamon sugar mixture on both sides to coat.
- Form Taco Shells: Fold each tortilla in half like a taco and place it over the upside-down cupcake pan using the cupcake bumps to support the taco shape. This helps form the shell structure. Repeat until the pan is filled; reuse pans if necessary.
- Bake Shells: Bake the shaped tortillas in the 400°F oven for 8-10 minutes until the shells begin to brown and crisp up.
- Cool Shells: Allow the taco shells to cool in the pan for 10 minutes (this lets them firm up), then transfer them to a cooling rack until completely cooled and crisp.
- Fill Tacos: Pipe a generous line of the chilled cheesecake filling across the center of each taco shell.
- Add Cherry Topping: Top each filled taco with 3 to 4 cherries along with some of the sauce from the cherry pie filling can.
- Serve: Serve immediately to enjoy the crisp texture of the shells with the creamy cheesecake filling and sweet cherries.
Notes
- Cooling the shells in the pan initially helps them retain their shape and prevents sogginess.
- Use a piping bag for neat and evenly filled tacos, but a Ziploc bag with a corner snipped can also work.
- Leftover cheesecake filling can be stored in the refrigerator for a few days and used as a dip or dessert topping.
- If you prefer a gluten-free version, substitute the flour tortillas with gluten-free tortillas.
- Ensure the Cool Whip is fully thawed before mixing for the smoothest texture.
- Prep Time: 20 minutes
- Cook Time: 10 minutes
- Category: Dessert
- Method: Baking
- Cuisine: American
Keywords: cherry cheesecake tacos, dessert tacos, cinnamon sugar tacos, no-bake cheesecake, cherry pie dessert, fun party desserts
