
Chicken Katsu Sandwich Recipe
Introduction
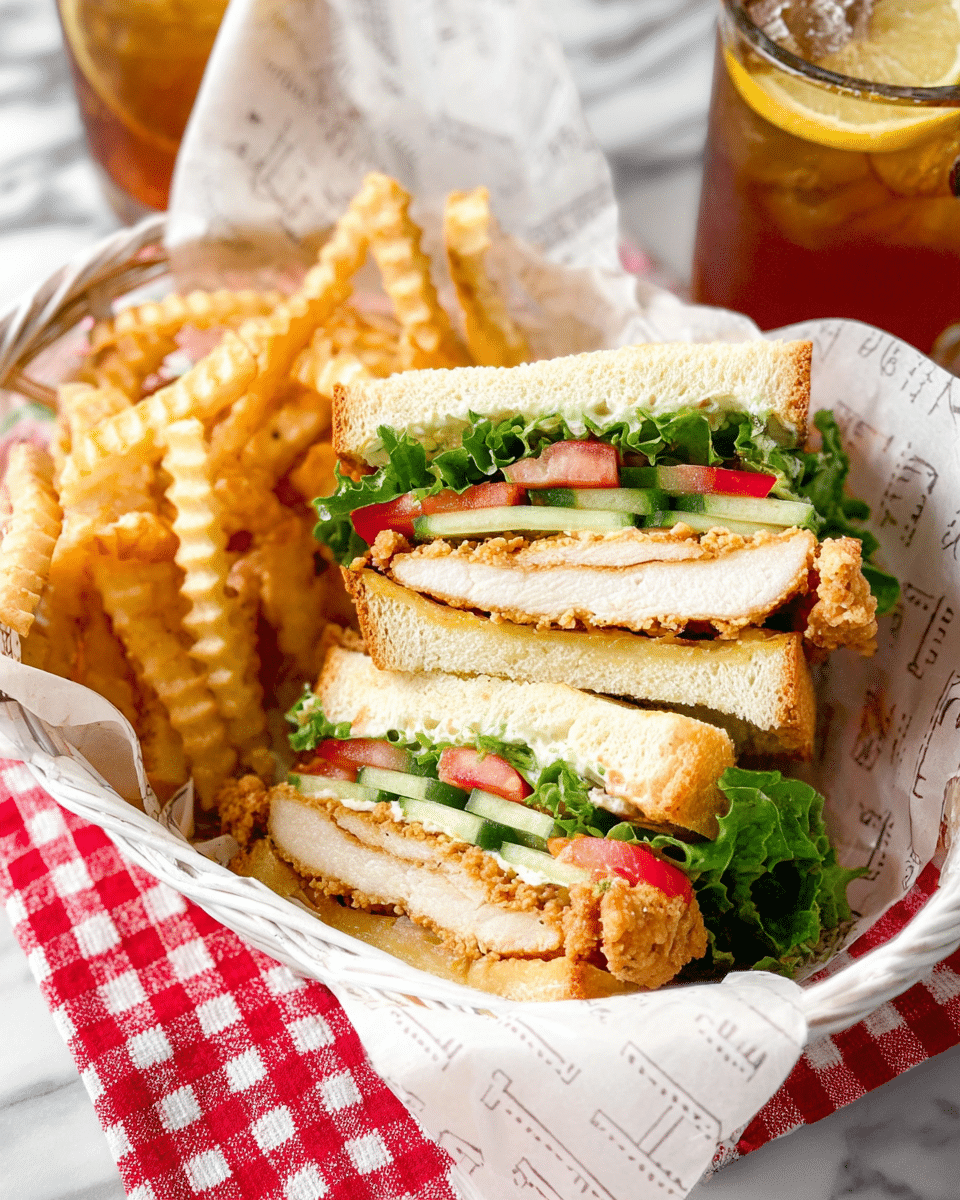
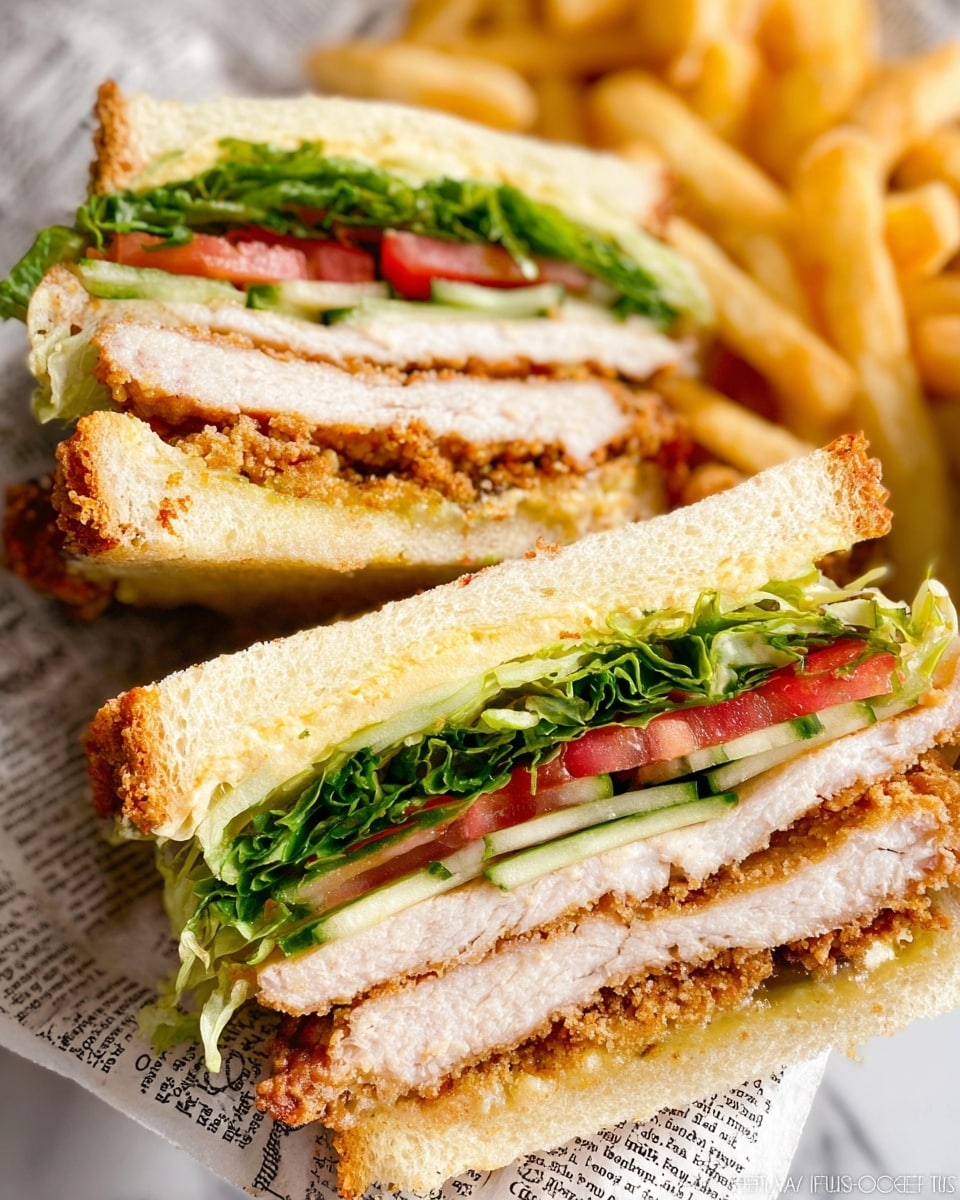
Chicken Katsu Sandwich is a delicious Japanese-inspired dish featuring crispy breaded chicken and flavorful garlic tonkatsu sauce. It’s perfect for a satisfying lunch or a casual dinner that’s easy to prepare at home.
Ingredients
- 1 cup panko (Japanese breadcrumbs)
- 1 Tbsp extra virgin olive oil
- 1 lb boneless, skinless chicken breast (2 pieces)
- Diamond Crystal kosher salt
- freshly ground black pepper
- 1 large egg (50 g each w/o shell)
- 1 Tbsp water
- ¼ cup all-purpose flour (plain flour)
- ½ English cucumber
- 2 tomatoes
- unsalted butter
- 4 toasts (Japanese milk bread called shokupan preferred)
- lettuce leaves
- 1 head garlic
- 1-2 Tbsp tonkatsu sauce (store-bought or homemade)
- 1-2 Tbsp Japanese Kewpie mayonnaise
Instructions
- Step 1: Preheat the oven to 400ºF (200ºC). For convection ovens, reduce temperature by 25ºF (15ºC). Place a rack in the middle position. Prepare the garlic for roasting by peeling away loose outer layers, trimming about ¼ inch off the top, drizzling 1–2 tsp olive oil on the exposed cloves, and wrapping the garlic in aluminum foil.
- Step 2: Roast the garlic in the oven for 40 minutes or until the cloves are soft when pierced. Set aside to cool slightly once done.
- Step 3: While garlic roasts, combine panko and 1 Tbsp olive oil in a frying pan. Toast over medium heat until golden brown, shaking the pan gently to avoid breaking the crumbs. Transfer the toasted panko to a bowl and let cool.
- Step 4: Butterfly the chicken breasts by slicing them horizontally almost to the other edge, then open like a book. Season with kosher salt and black pepper evenly.
- Step 5: In a bowl, whisk together the egg and water. Place flour in a separate bowl.
- Step 6: Dredge each chicken piece first in flour, shaking off excess, then dip into the egg wash, and finally coat thoroughly with toasted panko. Arrange chicken on a parchment-lined rimmed baking sheet.
- Step 7: Bake the chicken at 400ºF (200ºC) for 30 minutes or until cooked through and crispy.
- Step 8: Mash the roasted garlic cloves in a small bowl with a fork. Add 1-2 Tbsp tonkatsu sauce and 1-2 Tbsp Japanese Kewpie mayonnaise, mixing well to create the garlic tonkatsu sauce.
- Step 9: Slice the cucumber thinly using a peeler and cut tomatoes into thin slices.
- Step 10: Toast the sandwich bread if desired and spread with unsalted butter. Layer lettuce leaves and the baked chicken katsu on one slice, then spread a generous amount of garlic tonkatsu sauce over the chicken.
- Step 11: Add cucumber and tomato slices on top, then cover with another slice of toast. Cut the sandwich in half and serve immediately.
Tips & Variations
- Use Japanese milk bread (shokupan) for an authentic, soft texture, but any soft sandwich bread works well.
- For extra crispiness, try frying the breaded chicken instead of baking.
- Make your own homemade tonkatsu sauce for a fresher flavor; it typically combines ketchup, Worcestershire sauce, soy sauce, and sugar.
- Feel free to add pickled vegetables or mustard for an extra tangy twist.
Storage
Store any leftover chicken katsu and sauce components separately in airtight containers in the refrigerator for up to one day. Reheat the chicken gently in an oven or toaster oven to maintain crispiness. Assemble the sandwich fresh before serving to avoid sogginess.
How to Serve
Serve this delicious recipe with your favorite sides.
FAQs
Can I use chicken thighs instead of breasts?
Yes, boneless skinless chicken thighs can be used and will provide a juicier texture, though they may require slightly longer cooking time.
Is there a vegetarian alternative for this sandwich?
You can substitute the chicken with thick slices of fried tofu or eggplant, breaded and prepared similarly for a delicious vegetarian option.
Print
Chicken Katsu Sandwich Recipe
- Total Time: 55 minutes
- Yield: 2 sandwiches 1x
Description
This Chicken Katsu Sandwich recipe features crispy, golden-brown breaded chicken breast with a flavorful homemade Garlic Tonkatsu Sauce, complemented by fresh cucumber, tomato slices, and lettuce, all layered between toasted Japanese milk bread. The garlic is roasted to bring out its sweet, mellow flavor, which blends perfectly with tangy tonkatsu sauce and creamy Japanese Kewpie mayonnaise for a deliciously satisfying sandwich.
Ingredients
For the Chicken Katsu
- 1 cup panko (Japanese breadcrumbs)
- 1 Tbsp extra virgin olive oil (for toasting panko)
- 1 lb boneless, skinless chicken breast (2 pieces)
- Diamond Crystal kosher salt, to taste
- Freshly ground black pepper, to taste
- 1 large egg (50 g, without shell)
- 1 Tbsp water
- ¼ cup all-purpose flour (plain flour)
- Unsalted butter, for spreading on bread
- 4 slices Japanese milk bread (shokupan) or other sandwich bread, toasted if desired
For the Garlic Tonkatsu Sauce
- 1 head garlic
- 1–2 tsp extra virgin olive oil (to drizzle on garlic before roasting)
- 1–2 Tbsp tonkatsu sauce (store-bought or homemade)
- 1–2 Tbsp Japanese Kewpie mayonnaise
For the Sandwich Assembly
- ½ English cucumber, sliced thinly with a peeler
- 2 tomatoes, thinly sliced
- Lettuce leaves
Instructions
- Gather Ingredients: Assemble all the required ingredients to ensure a smooth cooking process.
- Preheat Oven and Prepare Garlic: Preheat the oven to 400ºF (200ºC), reducing by 25ºF (15ºC) if using a convection oven. Place a rack in the middle position. Peel away the loose outer layers of one head of garlic, trim about ¼ inch (6 mm) off the top to expose cloves, and drizzle 1–2 tsp olive oil over the exposed surface. Wrap the garlic in aluminum foil for roasting.
- Roast Garlic: Place the wrapped garlic in the oven and roast for about 40 minutes until a center clove is soft when pierced with a knife. Remove from oven and allow to cool slightly.
- Toast Panko Breadcrumbs: In a frying pan over medium heat, combine 1 cup panko and 1 Tbsp olive oil. Stir gently or shake the pan, avoiding breaking the breadcrumbs, until they turn golden brown. Transfer to a bowl to cool.
- Prepare Chicken Breast: Butterfly each chicken breast by slicing lengthwise nearly in half, then opening like a book for even thickness. Season both sides with kosher salt and freshly ground black pepper.
- Make Egg Wash: Whisk together 1 large egg and 1 Tbsp water in a medium bowl until combined.
- Dredge Chicken: Coat each chicken piece lightly with flour, shake off excess, then dip into the egg wash, and finally dredge thoroughly with the toasted panko breadcrumbs. Place on a rimmed baking sheet lined with parchment paper.
- Bake Chicken: Bake the breaded chicken in the preheated oven at 400ºF (200ºC) for 30 minutes until cooked through and golden brown. If the garlic isn’t done, move it to a higher rack or an open oven space to finish roasting.
- Make Garlic Tonkatsu Sauce: Once garlic has cooled, press cloves out of their papery skins into a small bowl and mash with a fork. Mix in 1-2 Tbsp tonkatsu sauce and 1-2 Tbsp Japanese Kewpie mayonnaise until well combined.
- Prepare Vegetables: Use a peeler to slice ½ English cucumber thinly and cut 2 tomatoes into thin slices.
- Toast Bread and Assemble Sandwich: Lightly butter each toast slice if desired. Place lettuce leaves on one slice, add a baked chicken katsu piece on top, and spread a generous amount of the Garlic Tonkatsu Sauce over the chicken. Layer cucumber slices and tomato slices on top, then cover with a second slice of bread. Cut the sandwich in half and serve immediately.
- Store Leftovers: Store any leftovers in an airtight container in the refrigerator for up to one day to maintain freshness and quality.
Notes
- Butterflying chicken breasts ensures even cooking and tender texture.
- Toasting panko breadcrumbs with olive oil adds extra crunch and flavor to the coating.
- Roasting garlic mellows its flavor, making a rich and sweet addition to the tonkatsu sauce.
- Japanese milk bread (shokupan) is preferred for its soft texture but can be substituted with any sandwich bread.
- Tonkatsu sauce can be homemade or store-bought depending on convenience.
- For crispier chicken, you can increase oven baking time by 5-10 minutes but monitor to prevent drying out.
- Leftover Garlic Tonkatsu Sauce can be refrigerated for up to 1 week in an airtight container.
- Prep Time: 15 minutes
- Cook Time: 40 minutes
- Category: Sandwich
- Method: Baking
- Cuisine: Japanese
Keywords: chicken katsu sandwich, Japanese sandwich, tonkatsu sauce, garlic tonkatsu sauce, breaded chicken, crispy chicken sandwich, shokupan sandwich


