
Fluffy Raspberry Cookies with a Marbled Pink Twist Recipe
Introduction
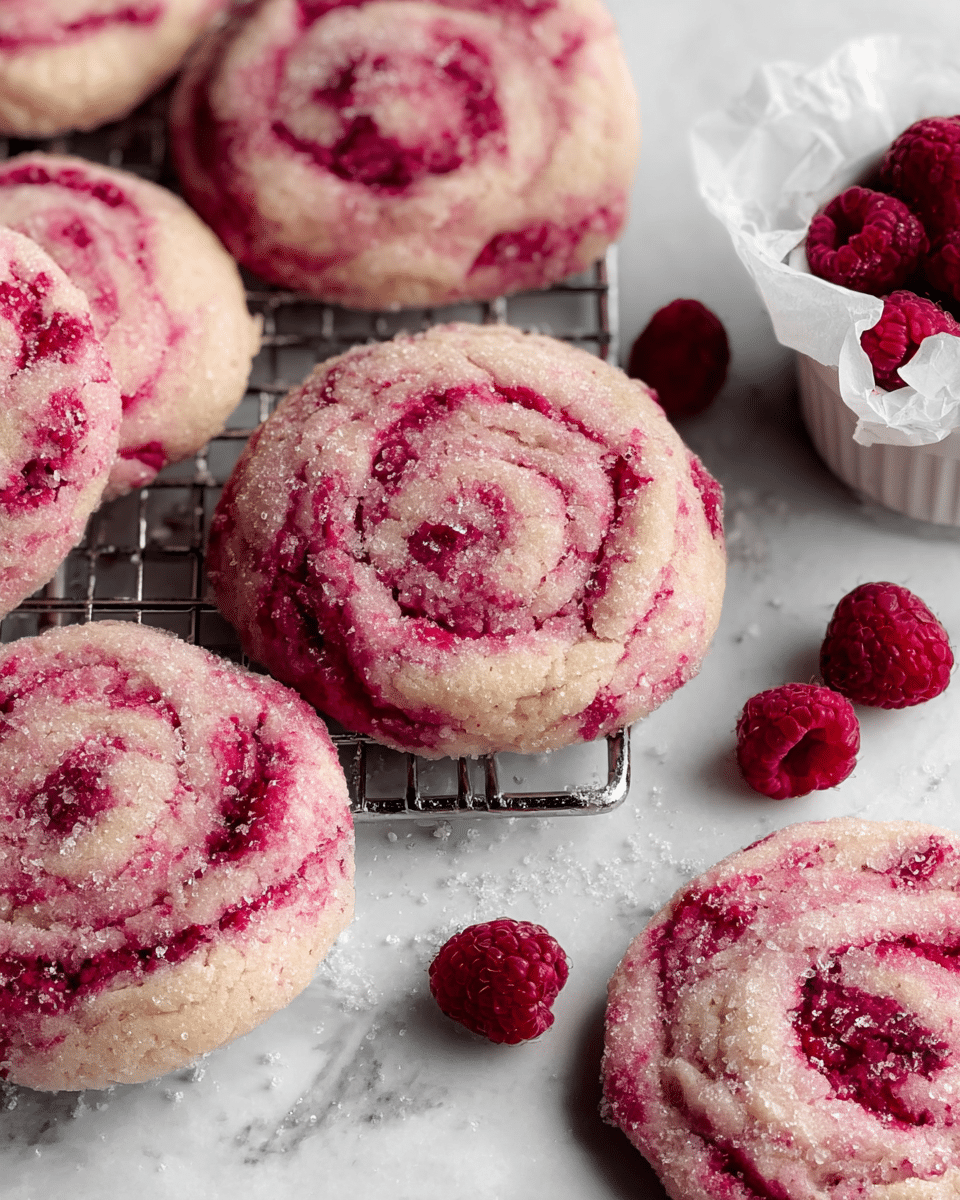
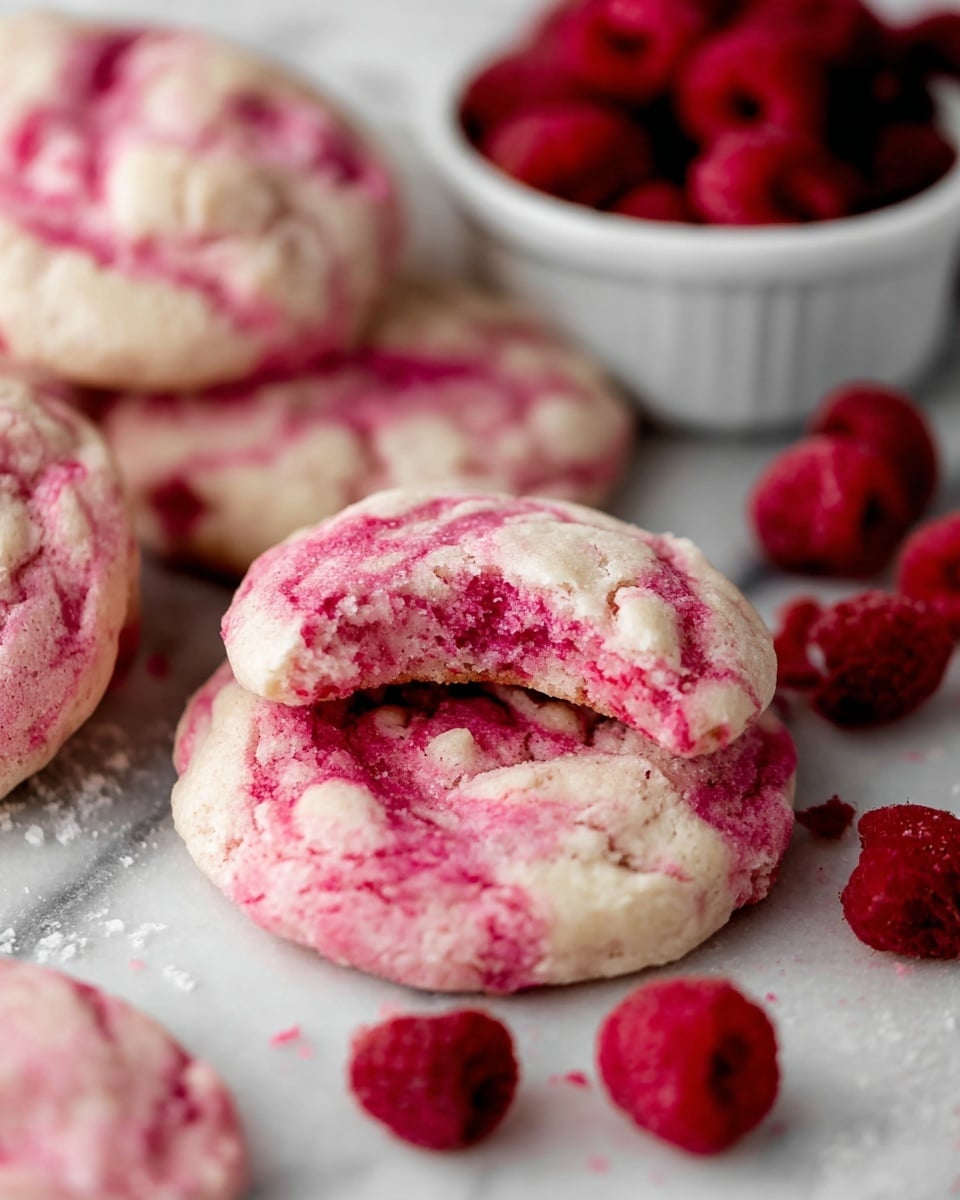
These Raspberry Cookies are soft, tender, and bursting with fresh raspberry flavor. Made with gluten-free flour and packed with real raspberries, they offer a delightful fruity twist perfect for any occasion.
Ingredients
- 1 cup frozen raspberries
- 1/4 cup granulated sugar
- 2 cups multipurpose gluten free flour (with xanthan gum)
- 1.5 tablespoons cornstarch
- 1.5 teaspoons baking powder
- 1/2 teaspoon kosher salt
- 1/2 cup unsalted butter or vegan baking stick, room temperature
- 1 1/4 cups plus 2 tablespoons granulated sugar
- 2 rounded tablespoons cornstarch mixed with 3 tablespoons water
- 3 tablespoons milk
- 3 tablespoons raspberry syrup (made from the raspberries and sugar below)
- 3 drops red food coloring (optional)
- 1/2 cup frozen raspberries, chopped into tiny pieces
Instructions
- Step 1: Prepare the raspberry syrup by cooking 1/4 cup granulated sugar and 1 cup frozen raspberries over medium heat, stirring constantly until syrupy and broken down (about 10 minutes). Strain through a mesh colander into a bowl, let cool. You should have 2-3 tablespoons of syrup.
- Step 2: Roughly chop 1/2 cup frozen raspberries and return them to the freezer until needed.
- Step 3: In a large bowl, whisk together gluten free flour, baking powder, cornstarch, and kosher salt. Set aside.
- Step 4: Mix the remaining 2 rounded tablespoons of cornstarch with 3 tablespoons water in a small bowl until smooth and watery.
- Step 5: In a large mixing bowl, beat butter and 1 1/4 cups sugar with an electric mixer until soft and creamy, about 2-3 minutes.
- Step 6: Slowly add the cornstarch-water mixture, milk, and cooled raspberry syrup to the creamed butter and sugar. It will appear pink and chunky.
- Step 7: Gradually beat in the flour mixture until just combined. If desired, add red food coloring and mix until blended.
- Step 8: Gently fold in the frozen chopped raspberries using a spatula, creating a marbled pink dough without overmixing.
- Step 9: Cover the dough with plastic wrap and freeze for at least 1 hour. This step is essential to prevent spreading.
- Step 10: Preheat the oven to 325°F (163°C) and line a baking sheet with parchment paper.
- Step 11: Use a large cookie scoop (about 2 ounces) to form 12 dough balls. Roll each ball in the extra 2 tablespoons granulated sugar to coat.
- Step 12: Place dough balls 3-4 inches apart on the baking sheet. Bake for 15 minutes, baking in batches if needed.
- Step 13: When cookies come out of the oven, immediately reshape them into circles with a spatula. Let cool on the baking sheet for 5 minutes before transferring to a cooling rack.
Tips & Variations
- Freeze the dough as directed to ensure the cookies hold their shape and do not spread too much.
- For a vegan version, substitute butter with a vegan baking stick and use non-dairy milk.
- Adjust the amount of red food coloring to your preference or omit it for a more natural look.
- Try adding a sprinkle of coarse sugar on top before baking for extra crunch.
Storage
Store baked cookies in an airtight container at room temperature for up to 3 days or in the refrigerator for up to a week. Unbaked dough balls can be kept frozen for up to 2 months; bake directly from frozen, adding a couple extra minutes to the baking time. Reheat cookies gently in a low oven or microwave to refresh their softness.
How to Serve
Serve this delicious recipe with your favorite sides.
FAQs
Can I use fresh raspberries instead of frozen?
Yes, fresh raspberries can be used. However, frozen raspberries help with the dough consistency and prevent it from becoming too wet. If using fresh, make sure to drain excess moisture well.
Why do I need to freeze the dough before baking?
Freezing the dough firms it up, which helps the cookies keep their shape and prevents them from spreading too much during baking. Skipping this step may result in thin, flat cookies.
Print
Fluffy Raspberry Cookies with a Marbled Pink Twist Recipe
- Total Time: 1 hour 35 minutes
- Yield: 12 large cookies 1x
- Diet: Gluten Free
Description
These delightful Raspberry Cookies are soft, chewy, and beautifully marbled with fresh frozen raspberries. Made with gluten-free flour and a subtle raspberry syrup, they offer a burst of fruity flavor balanced by a sweet and tender crumb. Perfect for a special treat that combines vibrant color and taste, these cookies are easy to make and ideal for those seeking gluten-free baked goods.
Ingredients
For the Raspberry Syrup
- 1 cup frozen raspberries
- 1/4 cup granulated sugar
For the Cookies
- 2 cups multipurpose gluten free flour (with xanthan gum included)
- 1.5 tablespoons cornstarch
- 1.5 teaspoons baking powder
- 1/2 teaspoon kosher salt
- 1/2 cup unsalted butter or vegan baking stick, room temperature
- 1 1/4 cups granulated sugar
- 2 rounded tablespoons cornstarch (for slurry)
- 3 tablespoons water (for slurry)
- 3 tablespoons milk
- 3 tablespoons raspberry syrup (strained from the syrup made earlier)
- 3 drops red food coloring
- 1/2 cup frozen raspberries, chopped into tiny pieces
- 2 tablespoons granulated sugar (for rolling dough balls)
Instructions
- Make the Raspberry Syrup: In a medium saucepan over medium heat, combine 1/4 cup granulated sugar with 1 cup frozen raspberries. Stir constantly and cook down until the raspberries have broken down and the mixture is syrupy but still slightly chunky, about 10 minutes.
- Strain the Syrup: Place a mesh colander over a bowl and pour the raspberry mixture through to separate seeds and solids. Set aside and allow the strained syrup to cool. There should be about 2-3 tablespoons of syrup.
- Prepare the Frozen Raspberries: Take 1/2 cup frozen raspberries and rough chop them into small pieces, careful not to over-process them into mush. Place the chopped raspberries back into a freezer-safe bowl and store in the freezer until ready to use.
- Mix Dry Ingredients: In a large bowl, whisk together the gluten-free flour, baking powder, cornstarch, and kosher salt until evenly combined. Set aside.
- Make Cornstarch Slurry: In a small bowl, mix the 2 rounded tablespoons cornstarch with 3 tablespoons water until smooth and watery. Initially thick and tacky, it will thin out with mixing.
- Cream Butter and Sugar: Using an electric mixer fitted with a paddle attachment, beat the softened butter and 1 1/4 cups granulated sugar until light, soft, and creamy, about 2-3 minutes.
- Add Wet Ingredients: Slowly add in the cornstarch slurry, milk, and cooled raspberry syrup to the creamed butter and sugar mixture. The batter will become pink and slightly chunky.
- Combine Dry Ingredients: Gradually beat in the gluten-free flour mixture until just incorporated. If desired, add red food coloring drops and mix lightly for even color distribution.
- Fold in Raspberries: Gently fold in the frozen chopped raspberries using a spatula, creating a marbled pink dough. Avoid overmixing to prevent the dough from becoming slimy.
- Freeze the Dough: Cover the dough bowl with plastic wrap and freeze for at least 1 hour. This step is essential to prevent excessive spreading during baking.
- Preheat Oven and Prepare Baking Sheet: When ready, preheat the oven to 325°F (163°C). Line a baking sheet with parchment paper.
- Scoop the Dough: Using a large ice cream or cookie scoop (about 2 ounces), portion dough into 12 scoops. Roll each dough ball in the extra 2 tablespoons granulated sugar to coat completely.
- Arrange and Bake: Place the dough balls 3-4 inches apart on the parchment-lined sheet. Bake for 15 minutes at 325°F. Bake in batches if needed, storing extra dough balls in the freezer.
- Shape and Cool: Immediately upon removing from the oven, gently reshape each cookie into a circle with a spatula to prevent crumbling. Let the cookies cool on the baking sheet for 5 minutes before transferring to a cooling rack to cool completely.
Notes
- Freezing the dough is critical to prevent cookie spreading; do not skip this step or substitute refrigeration.
- Use gluten-free flour with xanthan gum for best texture and structure.
- Be careful not to over chop frozen raspberries to avoid too much juice in the dough.
- If using gel or paste food coloring, reduce the number of drops to avoid strong coloring or taste impact.
- Reshape cookies right after baking to maintain their form and prevent crumbling.
- Store baked cookies in an airtight container at room temperature for up to 3 days or freeze for longer storage.
- Prep Time: 20 minutes
- Cook Time: 15 minutes
- Category: Dessert
- Method: Baking
- Cuisine: American
Keywords: Raspberry Cookies, Gluten Free Cookies, Soft Cookies, Berry Cookies, Gluten Free Baking
