
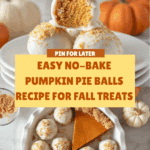
No-Bake Pumpkin Pie Balls Recipe
If you’ve ever wished you could enjoy all the cozy, warm flavors of pumpkin pie but in one bite-sized, utterly delightful treat, then you’re going to fall completely in love with these No-Bake Pumpkin Pie Balls. Imagine the luscious pumpkin pie filling transformed into creamy, decadent spheres coated in sweet, vanilla candy with a sprinkle of buttery pie crust crunch—it’s like pumpkin pie magic you can pop in your mouth with zero fuss or baking. These little gems are perfect for festive gatherings, last-minute desserts, or simply anytime you want to indulge in a bite of fall heaven without turning on the oven.
Ingredients You’ll Need
The beauty of No-Bake Pumpkin Pie Balls is in their simplicity. You only need a few ingredients, yet each one plays a vital role. The pumpkin pie brings that classic spicy sweetness, the candy coating provides a smooth, sweet shell, and the reserved crust crumbles add the perfect touch of buttery texture.
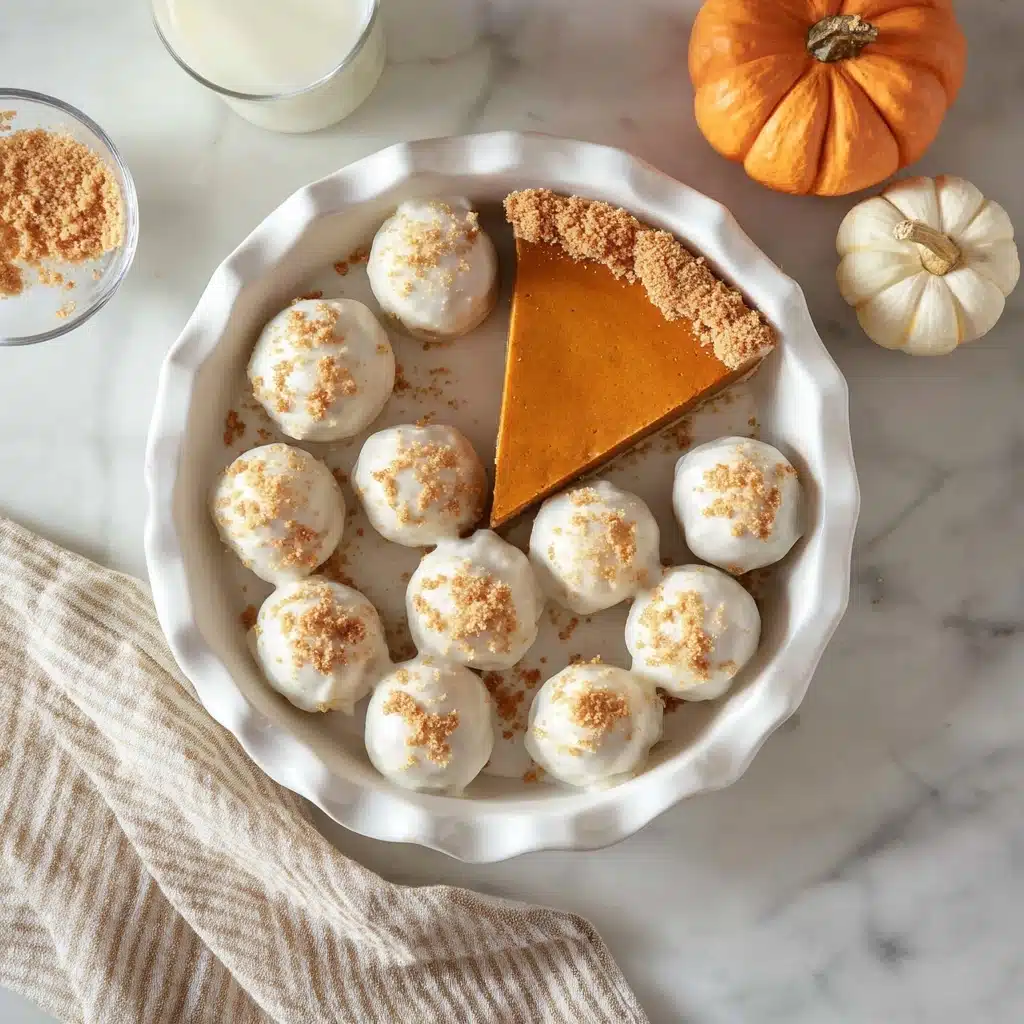
- 1 (9-inch) baked and chilled pumpkin pie: This is the heart of the recipe, offering the rich, spiced filling and flaky crust all in one.
- 1 (16 ounce) package vanilla candy coating or almond bark: This melts into a sweet, smooth coating that seals in all the pumpkin goodness and makes these balls irresistible.
How to Make No-Bake Pumpkin Pie Balls
Step 1: Reserve Some Crust
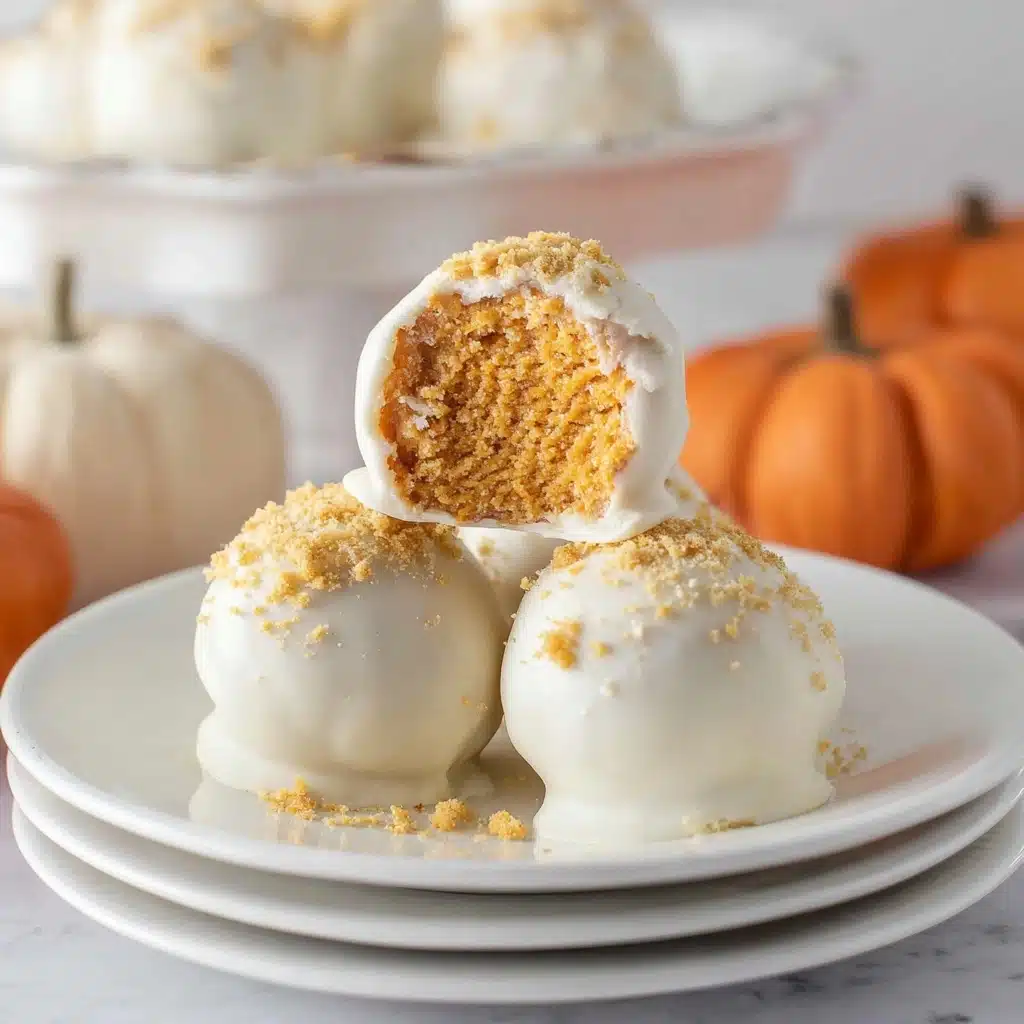
Start by setting aside a bit of the pie crust before breaking up the rest of the pie. Those crust crumbs will add a delightful crunch on top of the coated balls, turning each bite into a perfect balance between creamy and crisp.
Step 2: Form the Pie Mixture
Next, take your chilled pumpkin pie, filling and crust included, and break it into chunks in the bowl of an electric mixer. On low speed, mix until everything comes together into a moist, pliable ball of pumpkin pie goodness. If you don’t have a mixer handy, your hands work great for this step, too—just mix gently to combine without overworking.
Step 3: Shape Into Balls
Roll that pumpkin pie mixture into bite-sized balls, about 2 tablespoons each. Place them on a parchment-lined baking sheet and let them chill—either in the freezer for 30 minutes or the refrigerator for 2 hours—to firm up just enough for dipping.
Step 4: Dip in Vanilla Coating
Melt the vanilla candy coating according to the package directions in a shallow bowl. One by one, dip each pumpkin pie ball into the melted coating, using a fork to turn it completely. Lift it out and let excess coating drip back into the bowl, then place the coated ball back on the tray. While the coating is still wet, sprinkle some of those reserved pie crust crumbs on top to add that delightful texture contrast.
Step 5: Let Them Set
Finally, let the balls rest at room temperature or in the fridge until the candy coating is completely set. This hard shell locks in the creamy pumpkin pie center and gives these No-Bake Pumpkin Pie Balls their irresistible crunch exterior.
How to Serve No-Bake Pumpkin Pie Balls
Garnishes
While the pie crust crumbs are excellent on their own, you can jazz these up with a light dusting of cinnamon, a drizzle of caramel sauce, or even a sprinkle of crushed pecans for extra nutty richness. These simple touches enhance both the flavor and presentation beautifully.
Side Dishes
Though these treats stand proudly on their own, they pair wonderfully with a cup of hot coffee, spiced chai, or creamy vanilla ice cream. These pairings help balance the sweetness and make for a comforting fall snack or dessert duo.
Creative Ways to Present
These No-Bake Pumpkin Pie Balls can shine in many settings. Serve them on festive platters with autumn leaves or mini pumpkins for a holiday spread. Or pack them into small mason jars with decorative ribbons as charming edible gifts. For parties, place them on skewers or arrange them in cupcake liners for portion-friendly bites everyone will adore.
Make Ahead and Storage
Storing Leftovers
Keep your No-Bake Pumpkin Pie Balls fresh by storing them in an airtight container in the refrigerator. They’ll stay delicious for up to 4 days, making them perfect for prepping in advance or enjoying as a quick, sweet treat anytime you want.
Freezing
If you want to enjoy these joy-filled bites later, you can freeze them! Arrange the pie balls on a parchment-lined tray in a single layer and freeze until firm. Then transfer them to a freezer-safe container or bag. Frozen, they’ll keep well for up to 2 months without losing that lovely texture.
Reheating
Since these are best enjoyed cool, just let frozen No-Bake Pumpkin Pie Balls thaw in the refrigerator overnight before serving. They don’t need reheating; in fact, serving them chilled highlights their creamy texture and the crisp candy coating perfectly.
FAQs
Can I use a homemade pumpkin pie for this recipe?
Absolutely! Homemade pumpkin pie works wonderfully and lets you customize your spices and sweetness. Just be sure your pie is fully chilled before breaking it up and forming the balls.
What if I don’t have vanilla candy coating?
You can substitute with white chocolate chips or any almond bark you like. Just melt gently and follow the dipping directions for a smooth coating.
Can I make these gluten-free?
Yes! Use a gluten-free pumpkin pie and check that your candy coating or almond bark is gluten-free to keep these treats safe for gluten-sensitive guests.
How long do No-Bake Pumpkin Pie Balls last?
Stored in an airtight container in the fridge, they’ll stay fresh for about 4 days. Beyond that, texture and flavor might start to fade.
Can I add other flavors or mix-ins?
Definitely! Stir in some chopped nuts, mini chocolate chips, or even a splash of bourbon into the pie mixture for an adult twist. Get creative with toppings to make the recipe your own.
Final Thoughts
These No-Bake Pumpkin Pie Balls are truly a discovery—combining ease, flavor, and festive fall vibes all in one bite. Whether you’re whipping up a quick dessert or looking for a crowd-pleaser, they deliver joy and pumpkin pie flavor with zero oven time. Give them a try and watch how fast they disappear at your next gathering!
Print
No-Bake Pumpkin Pie Balls Recipe
- Total Time: 45 minutes (including chilling time)
- Yield: Approximately 20 pie balls 1x
- Diet: Vegetarian
Description
These No-Bake Pumpkin Pie Balls are a delightful and easy-to-make dessert perfect for fall gatherings and holiday celebrations. Made from a baked pumpkin pie mixed into bite-sized balls, then coated with a smooth vanilla candy coating and topped with crunchy pie crust crumbles, they offer a delicious pumpkin pie flavor in a fun and portable treat.
Ingredients
Pie Balls:
- 1 (9-inch) baked and chilled pumpkin pie (store-bought or homemade)
Coating:
- 1 (16 ounce) package vanilla candy coating or almond bark
Topping:
- Reserved pie crust from the pumpkin pie, crumbled
Instructions
- Reserve Pie Crust: Remove some crust from the baked pumpkin pie before mixing the filling. Crumble this reserved crust to use later as a topping on the coated pumpkin pie balls.
- Mix Pie Filling: Break up the chilled pie, including both filling and crust, into the bowl of an electric mixer. Beat on low speed until the mixture forms a moist, cohesive ball. Alternatively, you can use your hands to mix the pie in a large bowl until well combined.
- Form Balls: Roll the pie mixture into balls about 2 tablespoons in size. Place each ball on a parchment-lined baking sheet. Chill the balls in the freezer for 30 minutes or in the refrigerator for 2 hours to firm them up.
- Melt Candy Coating: Melt the vanilla candy coating or almond bark in a shallow bowl according to package instructions until smooth.
- Coat Pie Balls: Dip each chilled pie ball individually into the melted coating. Use a fork to fully cover the ball, allowing any excess coating to drip back into the bowl. Transfer the coated ball back onto the parchment-lined baking sheet and immediately sprinkle with reserved pie crust crumbles. Repeat for all pie balls.
- Set Coating: Allow the coated pumpkin pie balls to rest at room temperature until the candy coating has completely set and hardened, creating a crisp shell.
Notes
- Store pie balls in an airtight container in the refrigerator for up to 3 days.
- You can use homemade pumpkin pie or a good quality store-bought pie for convenience.
- If almond bark or candy coating is unavailable, white chocolate chips can be substituted for dipping.
- For extra decoration, consider drizzling melted chocolate over the coated balls before the coating sets.
- Make sure the pie balls are well-chilled before dipping to ensure a smooth coating.
- Prep Time: 15 minutes
- Cook Time: 0 minutes (no baking required)
- Category: Dessert, Snack
- Method: No-Bake, Chilling, Dipping
- Cuisine: American
Nutrition
- Serving Size: 1 pie ball (approximately 30 grams)
- Calories: 110
- Sugar: 15g
- Sodium: 90mg
- Fat: 5g
- Saturated Fat: 3.5g
- Unsaturated Fat: 1.2g
- Trans Fat: 0g
- Carbohydrates: 17g
- Fiber: 1g
- Protein: 1g
- Cholesterol: 10mg
Keywords: pumpkin pie balls, no-bake pumpkin dessert, pumpkin pie snack, fall desserts, holiday treats, candy coated pumpkin balls

