
Vanilla Bean Crème Brûlée Recipe
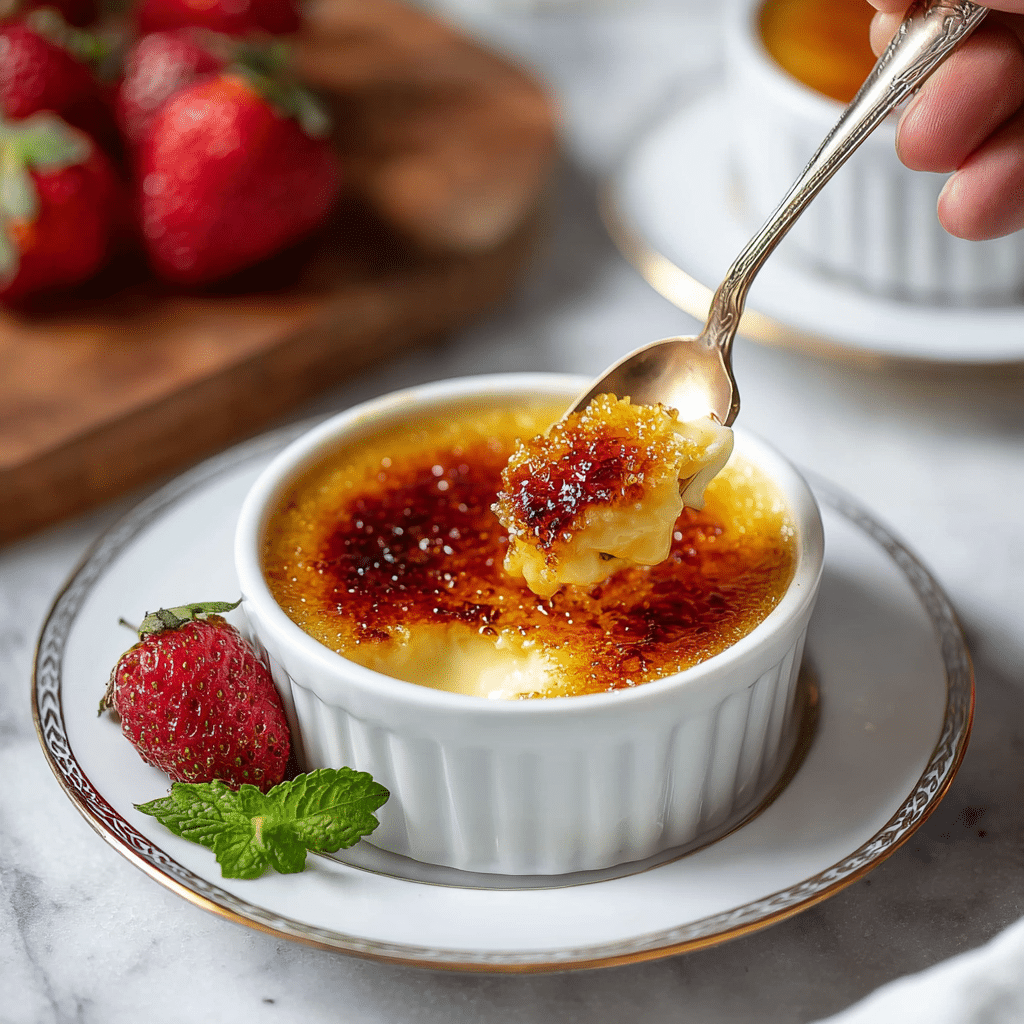
If you love rich, creamy desserts that feel both indulgent and timeless, then you are in for a serious treat with this Vanilla Bean Crème Brûlée. This classic French dessert combines a luxuriously smooth custard infused with fragrant vanilla bean seeds, topped with a perfectly caramelized sugar crust that cracks satisfyingly with every spoonful. It’s an elegant yet approachable recipe that transforms simple ingredients like cream, eggs, and sugar into a show-stopping finale for any meal. Trust me, once you master this Vanilla Bean Crème Brûlée, it will become your go-to dessert for entertaining or spoiling yourself on a quiet evening.
Ingredients You’ll Need
Don’t let the few ingredients fool you; each one plays a crucial role in bringing this Vanilla Bean Crème Brûlée to life. From the creamy texture the heavy cream provides to the aromatic depth from the vanilla bean, every element is essential for that perfect balance of flavors and textures.
- Heavy cream: Provides the rich, silky base that makes the custard so luscious.
- Whole milk: Lightens the cream slightly for the ideal custard consistency without losing creaminess.
- Sugar (115 g): Sweetens the custard gently, balancing the vanilla and cream.
- Vanilla bean: The star flavor that infuses delicate, fragrant notes—scraping the seeds is key for that authentic taste.
- Egg yolks: Give the custard its structure and velvety texture.
- Kosher salt: Enhances all the flavors and cuts through the sweetness subtly.
- Granulated sugar (for topping): Creates the iconic caramelized crust that makes this dessert unforgettable.
How to Make Vanilla Bean Crème Brûlée
Step 1: Prepare the Cream
Start by combining the heavy cream, whole milk, and sugar in a saucepan. Split your vanilla bean lengthwise and scrape out those precious tiny seeds directly into the cream, then toss in the pod itself. Gently heat the mixture over medium heat, whisking often to dissolve the sugar. When you see steam rising and tiny bubbles forming around the edges, remove from heat and allow it to cool slightly. This infusion is where your custard’s irresistible vanilla flavor begins to develop.
Step 2: Whisk the Egg Yolks
While the cream cools for a couple of minutes, whisk the egg yolks until smooth in a heatproof vessel—this step ensures your custard will be silky and free from lumps. Gradually temper the yolks by slowly pouring a bit of the hot cream into them while constantly whisking. This keeps the eggs from scrambling when combined with the warm liquid.
Step 3: Combine and Strain
Pour the rest of the warm cream into the egg yolks while stirring steadily, then whisk in a pinch of kosher salt to enhance the flavor. If you notice any foam on top of your mixture, skim it off carefully so your custard surface won’t have unsightly bubbles. Straining the mixture through a fine sieve before pouring into ramekins helps achieve that perfectly smooth texture that makes Vanilla Bean Crème Brûlée so crave-worthy.
Step 4: Bake the Custards
Fill six 4-ounce ramekins with your custard mixture and nestle them into a deep baking pan. Carefully pour boiling water around the ramekins, filling the pan about three-quarters up their sides to create a gentle, even cooking environment. Pop the whole setup into a 325-degree oven and bake until the custards are mostly set but still have a slight jiggle—this usually takes about 30 to 35 minutes. This water bath method is critical to avoid cracking and overcooking your custards.
Step 5: Chill and Caramelize
Once baked, remove the ramekins from the water and let them cool to room temperature before refrigerating for at least three hours or up to three days. When it’s time to impress your guests or simply indulge yourself, sprinkle a teaspoon or two of granulated sugar evenly atop each custard. Using a kitchen blowtorch, melt and caramelize the sugar until it forms a glossy, golden crust. This final step is what gives Vanilla Bean Crème Brûlée its signature crunchy top that contrasts beautifully with the creamy custard beneath.
How to Serve Vanilla Bean Crème Brûlée
Garnishes
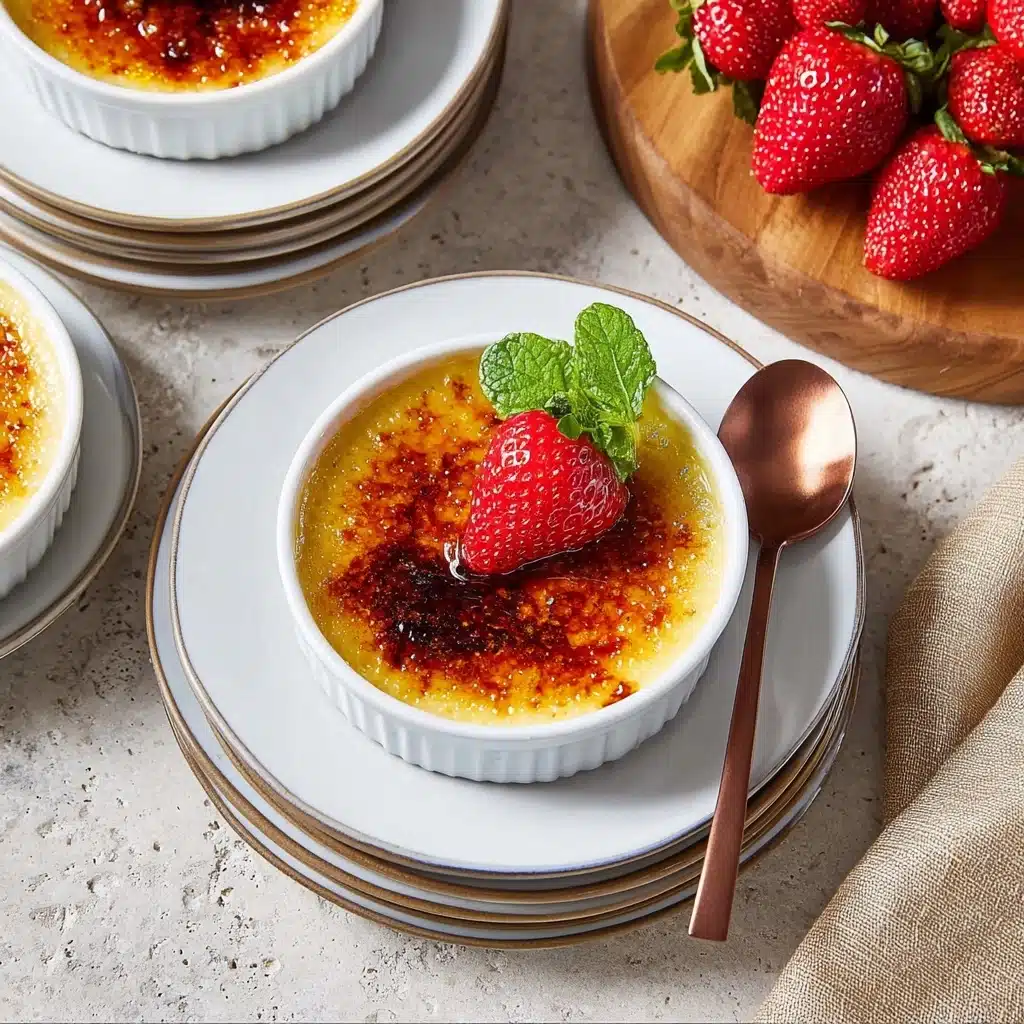
A simple caramelized sugar crust is perfection on its own, but you can elevate your Vanilla Bean Crème Brûlée with fresh berries like raspberries or strawberries to add a burst of color and subtle tartness. A sprig of fresh mint also adds a pop of green and a refreshing aroma, balancing the richness of the custard.
Side Dishes
Since Vanilla Bean Crème Brûlée is wonderfully rich, keep sides light. A crisp fresh fruit salad or a small scoop of tangy sorbet pairs nicely without overwhelming your palate. Alternatively, a delicate cookie or tuile offers a pleasant crunch without competing with the dessert.
Creative Ways to Present
Serve the custards in individual ramekins for a classic look or experiment with unique vessels like vintage teacups or mini cast-iron skillets for a charming twist. Another fun idea is to offer a DIY station where guests caramelize their own sugar crust at the table—this adds an interactive and theatrical touch to your gatherings.
Make Ahead and Storage
Storing Leftovers
Vanilla Bean Crème Brûlée can be stored covered in the refrigerator for up to three days. Keep it chilled to maintain that creamy texture and prevent the custard from spoiling. It’s a perfect dessert to prepare ahead for dinner parties.
Freezing
Freezing Vanilla Bean Crème Brûlée is not recommended because the custard can separate and lose its smooth texture. Stick to refrigeration to keep your dessert pristine.
Reheating
Reheat by simply caramelizing the sugar topping again with a kitchen blowtorch before serving. The custard itself is best enjoyed cold, so skip microwaving or warming the custard portion.
FAQs
What is the purpose of the water bath in baking Vanilla Bean Crème Brûlée?
The water bath gently surrounds the custards with moist heat, helping them cook evenly and preventing the eggs from curdling. This step is crucial for that smooth, velvety texture.
Can I use vanilla extract instead of a vanilla bean?
You can, but the flavor won’t be as rich or aromatic. Vanilla beans provide those tiny fragrant seeds and a depth of flavor that elevate this dessert to another level.
How do I know when the custard is done baking?
Look for custards that are set around the edges but still slightly jiggly in the center. They will firm up more as they chill in the fridge.
Why does my caramelized sugar sometimes burn or not melt properly?
Hold the torch a couple of inches from the sugar and keep it moving in circles to ensure even caramelization. Avoid holding the flame in one place too long, which causes burning.
Can I make Vanilla Bean Crème Brûlée vegan or dairy-free?
This classic relies on dairy and eggs for its creamy texture. While vegan alternatives exist, the result will not be quite the same. Experimenting with coconut cream and plant-based custard thickeners can be fun but it’s a different dessert experience.
Final Thoughts
Making Vanilla Bean Crème Brûlée at home might seem fancy, but with a bit of care and patience, it’s genuinely achievable and incredibly rewarding. The crackling sugar topping paired with the rich, vanilla-infused custard is a magical combination that’s sure to dazzle anyone lucky enough to taste it. So don’t hesitate—grab your vanilla bean and torch, and treat yourself to this classic dessert that never goes out of style!

Vanilla Bean Crème Brûlée Recipe
- Total Time: 4 hours (including chilling time)
- Yield: 6 servings 1x
- Diet: Vegetarian
Description
This classic Vanilla Bean Crème Brûlée recipe features a rich and creamy custard infused with real vanilla bean, topped with a perfectly caramelized sugar crust. A sophisticated and elegant dessert, it’s smooth, velvety, and offers the delightful contrast of creamy custard and crunchy caramelized sugar topping, making it a timeless favorite for any occasion.
Ingredients
Custard Base
- 2 cups heavy cream
- 1/2 cup whole milk
- 1/2 cup sugar (115 g)
- 1 vanilla bean
- 5 egg yolks
- 1/4 teaspoon kosher salt
Caramelized Topping
- 12 teaspoons granulated sugar (for topping)
Instructions
- Preheat Oven: Preheat the oven to 325 degrees Fahrenheit to prepare for baking the custards.
- Combine Cream, Milk, and Sugar: In a saucepan, pour in the heavy cream and whole milk, then add the sugar, stirring gently to combine.
- Add Vanilla Bean: Split the vanilla bean lengthwise and scrape the seeds into the cream mixture. Add the vanilla bean pod as well to infuse more flavor.
- Heat Cream Mixture: Heat the mixture over medium heat, whisking frequently to dissolve sugar and infuse vanilla, but do not let it boil.
- Steam and Cool: When the cream just begins to steam and small bubbles form around edges (around 5 minutes), turn off the heat and let it cool for 2 minutes.
- Whisk Egg Yolks: Meanwhile, in a measuring cup with a spout, whisk the egg yolks until smooth and uniform.
- Temper the Eggs: Gradually pour a few ounces of the hot cream into the egg yolks while whisking constantly to temper and prevent curdling.
- Combine Mixtures: Slowly add the remaining cream mixture to the egg yolks while stirring constantly to create a smooth custard base.
- Add Salt: Whisk in the kosher salt to balance the sweetness and enhance flavor.
- Remove Foam: If there is any foam on top of the mixture, skim it off to avoid bubbles forming on the custard surface.
- Prepare Water Bath: Bring a kettle of water to a boil to use for the water bath in baking.
- Fill Ramekins: Pour the custard mixture evenly into six 4-ounce ramekins and arrange them in a 9×13 inch baking dish.
- Add Hot Water: Carefully pour the boiling water into the baking dish around the ramekins until it reaches about three-quarters up the sides.
- Bake Custards: Bake the custards for 30 to 35 minutes until they are set but slightly jiggly in the centers.
- Cool Custards: Remove the baking dish from the oven carefully. Take out the ramekins and place them on a cooling rack until they reach room temperature, then refrigerate for at least 3 hours and up to 3 days.
- Add Sugar Topping: Before serving, sprinkle 2 teaspoons of granulated sugar evenly over the surface of each custard.
- Caramelize Sugar: Using a kitchen blowtorch, hold it a few inches from the custard and move in circular motions to melt and caramelize the sugar until golden brown and crisp.
- Repeat for All Custards: Repeat the caramelizing process for each custard until all have a crispy sugar crust.
- Serve: Serve immediately for the best texture, or refrigerate for up to an hour before serving.
Notes
- To prevent cracking, avoid overbaking the custards; they should still jiggle slightly in the center when done.
- Use fresh vanilla beans for the best flavor; vanilla extract can be substituted but the flavor will be less intense.
- Skimming off the foam helps achieve a smooth top surface on the custards.
- Be cautious when handling hot water bath to avoid burns.
- If you do not have a blowtorch, you can broil the sugar topping in the oven, but watch closely to avoid burning.
- This dessert can be made up to three days in advance and stored refrigerated without the sugar topping.
- Prep Time: 15 minutes
- Cook Time: 35 minutes
- Category: Dessert
- Method: Baking, Torch Caramelizing
- Cuisine: French
Nutrition
- Serving Size: 1 ramekin (approx. 120 g)
- Calories: 320 kcal
- Sugar: 30 g
- Sodium: 80 mg
- Fat: 24 g
- Saturated Fat: 15 g
- Unsaturated Fat: 7 g
- Trans Fat: 0 g
- Carbohydrates: 27 g
- Fiber: 0 g
- Protein: 5 g
- Cholesterol: 210 mg
Keywords: vanilla bean crème brûlée, classic French dessert, custard dessert, caramelized sugar topping, elegant dessert
