
White Chocolate Pink Swirl Fudge with Heart Sprinkles Recipe
Introduction
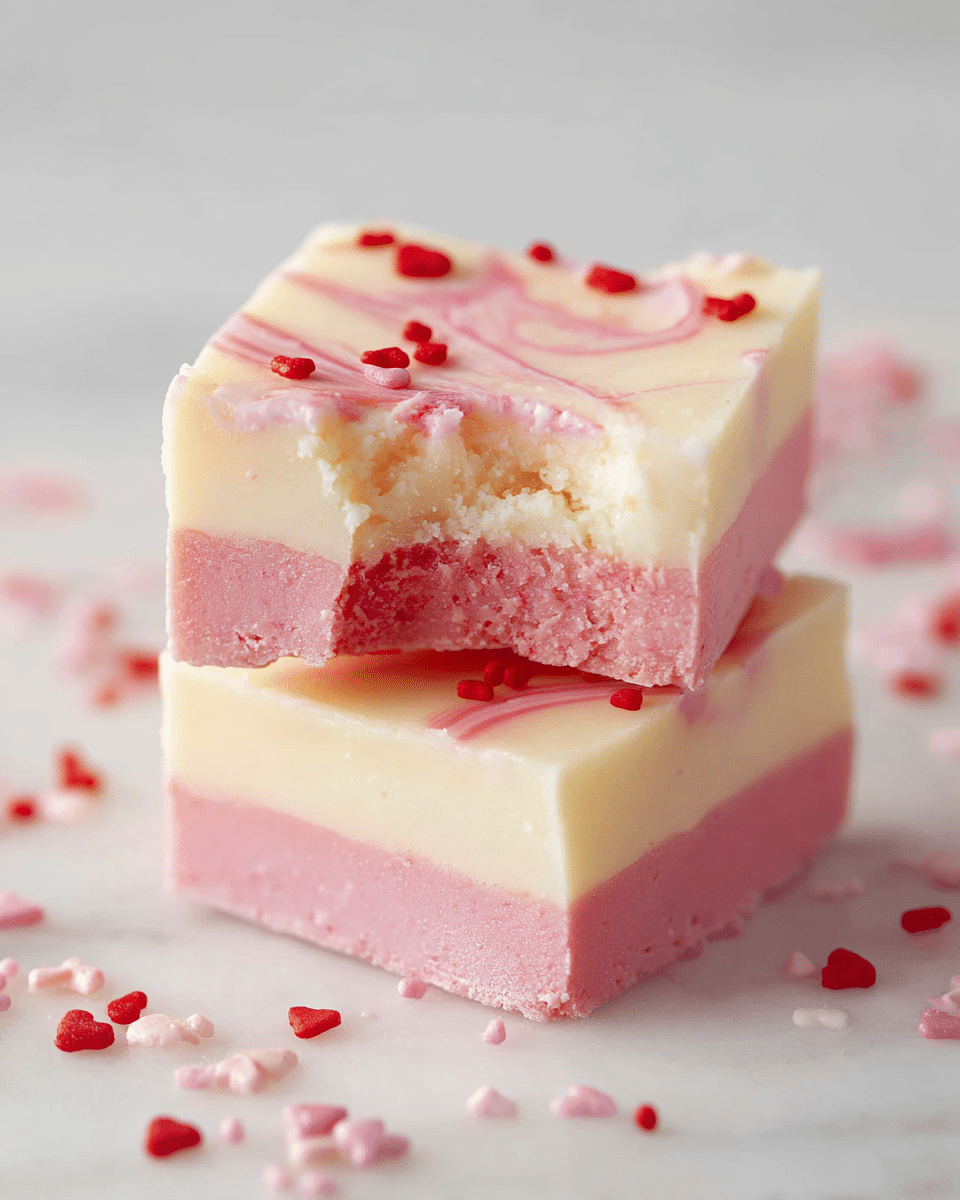
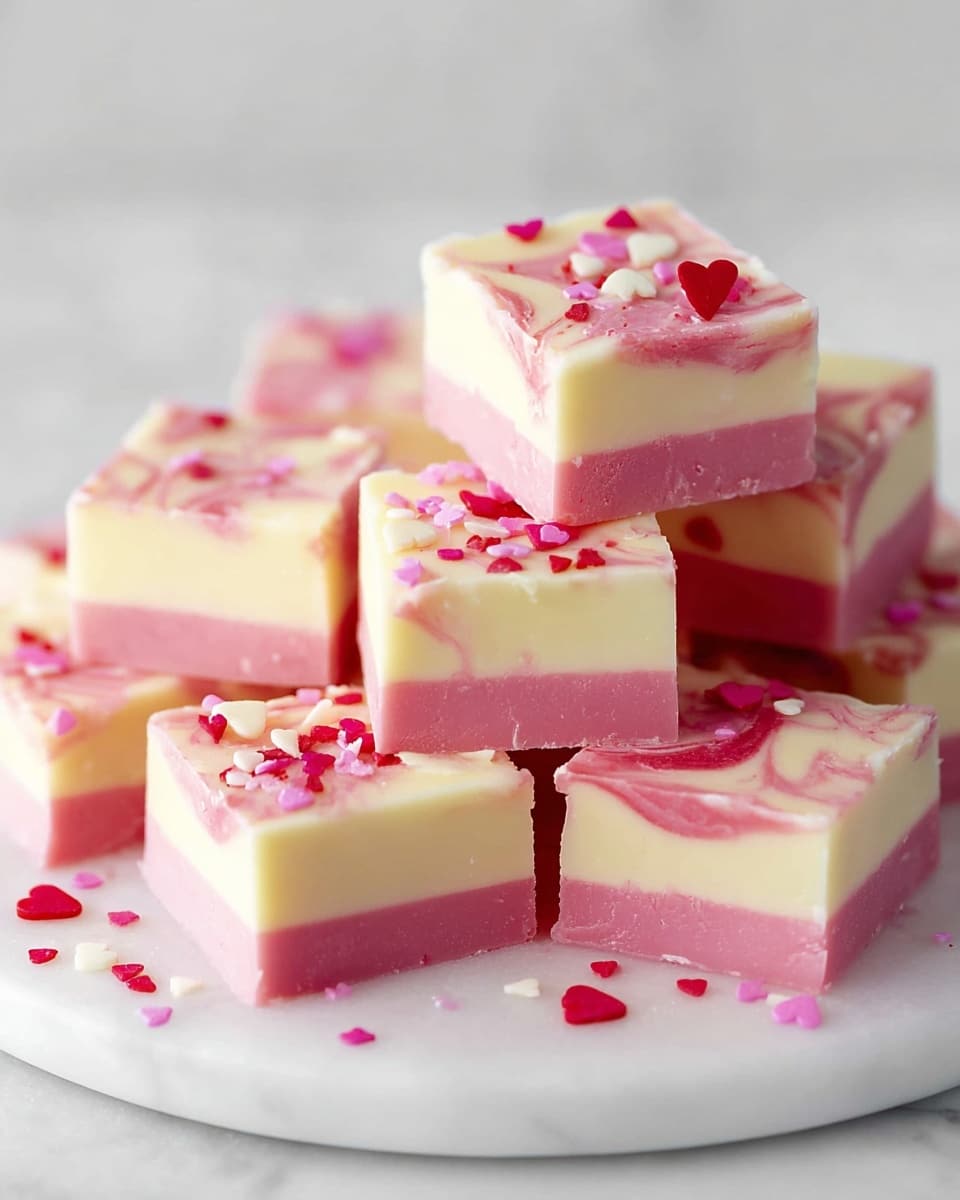
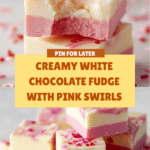
White Chocolate Fudge is a rich and creamy treat that’s perfect for special occasions or whenever you need a sweet indulgence. This layered fudge features a delicate pink swirl and a sprinkle of heart-shaped decorations, making it both delicious and visually appealing.
Ingredients
- 3 1/2 cups white chocolate chips (divided)
- 14 ounces canned sweetened condensed milk (divided)
- 2 tablespoons unsalted butter (divided)
- Pink or red food coloring
- Pink or red gel icing
- 1 tablespoon heart-shaped sprinkles
Instructions
- Step 1: Prepare an 8×8 square pan by lining it with parchment paper or foil sprayed with non-stick spray.
- Step 2: In a microwave-safe bowl, combine half of the white chocolate chips, half of the sweetened condensed milk, and half of the butter.
- Step 3: Microwave the mixture in 20-second bursts, stirring after each, until the chocolate is melted and smooth. This should take less than 2 minutes. Avoid overcooking.
- Step 4: Stir in 8 drops of pink or red food coloring until the mixture is evenly colored and smooth.
- Step 5: Pour the colored fudge into the prepared pan and smooth the top with a spoon or offset spatula. Place it in the freezer while preparing the next layer.
- Step 6: In another microwave-safe bowl, combine the remaining white chocolate chips, sweetened condensed milk, and butter.
- Step 7: Microwave in 20-second bursts, stirring each time, until melted and smooth.
- Step 8: Pour the white fudge over the pink layer and gently smooth the top.
- Step 9: Dab a few drops of pink or red gel icing evenly on top. Use a toothpick to swirl the icing, creating pretty patterns.
- Step 10: Sprinkle heart-shaped sprinkles evenly over the top.
- Step 11: Cover the pan with plastic wrap and refrigerate for at least 2 hours until set.
- Step 12: Remove the fudge from the pan using the parchment or foil liner. Slice into 16 pieces and serve.
Tips & Variations
- Use a gentle hand when swirling the gel icing to create elegant patterns without mixing the colors too much.
- For a different flavor, try adding a teaspoon of vanilla extract to the fudge mixture before melting.
- Swap heart-shaped sprinkles for crushed candy canes during the holidays for a festive twist.
Storage
Store the fudge in an airtight container in the refrigerator for up to 1 week. For longer storage, freeze the fudge wrapped tightly in plastic wrap and placed in a freezer bag for up to 3 months. When ready to enjoy, thaw in the refrigerator before serving.
How to Serve
Serve this delicious recipe with your favorite sides.
FAQs
Can I use regular food coloring instead of gel icing?
Yes, regular food coloring works well for coloring the fudge base. However, gel icing is recommended for the top swirls because it holds its shape better and creates more vibrant designs.
Is it necessary to freeze or refrigerate the fudge to set it?
Refrigeration is essential to give the fudge time to firm up properly. Freezing the first layer speeds up the process for layering, but final setting should be done in the refrigerator.
Print
White Chocolate Pink Swirl Fudge with Heart Sprinkles Recipe
- Total Time: 2 hours 15 minutes
- Yield: 16 pieces 1x
Description
This White Chocolate Fudge recipe features two luscious layers of creamy white chocolate, one tinted with pink food coloring and the other pure white, beautifully swirled together and topped with heart-shaped sprinkles. It’s a no-bake, simple treat perfect for special occasions or a sweet indulgence.
Ingredients
Fudge Layers
- 3 1/2 cups white chocolate chips (divided)
- 14 ounces canned sweetened condensed milk (divided)
- 2 tablespoons unsalted butter (divided)
- Pink or Red Food Coloring (8 drops)
Topping
- Pink or Red Gel Icing (a few drops)
- 1 tablespoon heart-shaped sprinkles
Instructions
- Prepare the Pan: Line an 8×8 square pan with parchment paper or foil and spray it lightly with non-stick spray to ensure easy removal of the fudge.
- Make Pink Fudge Layer: In a microwave-safe bowl, combine half of the white chocolate chips, half of the sweetened condensed milk, and half of the unsalted butter. Microwave in 20-second intervals, stirring between each, until the chocolate is fully melted and smooth but not overcooked.
- Add Color to Pink Layer: Stir 8 drops of pink or red food coloring into the melted mixture until the color is evenly blended and smooth.
- Freeze Pink Layer: Pour the pink fudge mixture into the prepared pan and smooth the surface with a spoon or an offset spatula. Place it in the freezer to set while preparing the next layer.
- Make White Fudge Layer: In a clean microwave-safe bowl, combine the remaining white chocolate chips, sweetened condensed milk, and butter. Microwave again in 20-second bursts, stirring each time until melted and smooth.
- Pour White Layer: Pour the white fudge layer gently over the chilled pink layer, smoothing the top carefully to create an even surface.
- Create Swirls: Add a few drops of pink or red gel icing evenly over the white fudge. Using a toothpick, swirl the gel icing into the white fudge to create decorative patterns.
- Add Sprinkles: Sprinkle the heart-shaped sprinkles evenly over the top layer for a festive touch.
- Chill to Set: Cover the pan with plastic wrap and place it in the refrigerator for at least 2 hours to allow the fudge to firm up completely.
- Slice and Serve: Once set, remove the fudge from the pan using the parchment or foil edges and slice it into 16 pieces before serving.
Notes
- Do not overheat the white chocolate in the microwave; overcooked chocolate can become grainy.
- For easy removal, ensure the pan is well lined and lightly sprayed with non-stick spray.
- You can substitute gel icing colors to create different swirl effects.
- Store the fudge in an airtight container in the refrigerator for up to one week.
- Allow the fudge to sit at room temperature for 10 minutes before serving to soften slightly.
- Prep Time: 10 minutes
- Cook Time: 5 minutes (microwaving in intervals)
- Category: Dessert
- Method: No-Cook
- Cuisine: American
Keywords: white chocolate fudge, no-bake fudge, pink fudge, holiday dessert, sweet treat, white chocolate recipe